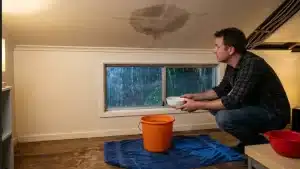
A leaking roof does not announce itself at a convenient time. It usually starts during a Queensland storm at midnight, or on a Sunday afternoon when you are already stretched thin. One moment everything is fine. The next, there is a dark stain spreading across your ceiling and water hitting your floorboards.
That first half hour is where the real damage is either contained or allowed to compound. The difference between a $400 repair and a $15,000 interior or roof restoration is almost always a question of how quickly a homeowner acted in those first minutes. Water does not wait. It follows rafters, saturates insulation, softens timber framing, and in Queensland’s warm and humid climate, creates the conditions for mould growth within 24 to 48 hours of the initial intrusion.
This is a calm, practical guide written for exactly that moment of stress. No padding. No unnecessary detail. Just what to do, in the right order, with the reasoning behind each step so you understand why it matters.

Step One: Protect What Is Inside Your Home — Immediately
Before you look at the ceiling, before you call anyone, before you do anything else — clear the area.
Move furniture, electronics, rugs, artwork, important documents, and anything else in the drip zone away from the wet area right now. Do not wait to see how serious the leak is before you move things. Move them first, then assess. Wet electronics are a write-off. Timber flooring begins to swell and warp within hours. Soft furnishings hold moisture deep in their fibres and become a breeding ground for mould within days in Queensland’s climate.
This step takes two minutes. It can save you thousands.

Step Two: Catch and Contain the Water
Place the largest containers you have directly beneath the active drip. A large bucket, a rubbish bin, a laundry basket lined with a plastic bag — anything that holds water will do the job. If the drip is splashing and spreading across your floor, put an old towel in the base of the container to absorb the impact and stop water bouncing out.
Here is a practical trick that most homeowners never hear about until a roofer tells them. Tie a piece of string around the drip point on the ceiling and let it hang down into the bucket. Water follows the string by surface tension rather than splattering across your floorboards. It sounds almost too simple to work. It genuinely works.
Lay old towels, drop sheets, or even folded newspaper on the floor around the affected area to soak up any water that has already spread. Your goal is to put the water where you want it rather than letting it find its own path across your flooring and into the subfloor beneath.

Step Three: Check for Electrical Danger — This Step Cannot Wait
Look at the ceiling carefully before you touch anything else in that area. Is water dripping from or near a light fitting? Is moisture forming around a ceiling fan, a smoke detector, or a downlight recess? Is water running down a wall that contains power points or wiring?
If the answer to any of those questions is yes, go to your switchboard and turn off the circuit breaker that controls power to that part of the house. Do it now. Water and electricity together are a life-threatening combination, and this is the step that most homeowners skip in the panic of the moment.
In a typical Toowoomba home, the ceiling cavity contains electrical wiring, junction boxes, and insulation that may have been in place for decades. When water saturates that space it creates an unintended conductor between components that were never designed to interact. The result can be short circuits, electrical arcing, and in the worst cases a fire that begins inside a wall or ceiling cavity where you cannot see it while it grows.
The rule is straightforward. When you have any doubt at all, switch off the breaker. A night without power to one room is an inconvenience. The alternative is not.

Step Four: Document Everything Before You Clean a Single Thing
Take out your phone and begin photographing and filming the leak from multiple angles. Capture the active drip and the source of it on the ceiling. Photograph the full spread of the water stain. Document any damaged belongings. Photograph the steps you have already taken — your buckets, your towels, your drop sheets on the floor.
Also write down or record a voice note of the following. When you first noticed the leak. What the weather was doing at that time. Whether there was any recent event that might have caused or worsened the damage, such as a storm, strong winds, hail, or tree branches making contact with the roof.
This documentation is not optional if you plan to make a home insurance claim. Insurers in Queensland want evidence that the damage was sudden and accidental rather than the result of ongoing neglect, and that you took reasonable steps to prevent further loss. Timestamped photos and a written timeline provide exactly that evidence. Do not clean up before you have documented everything thoroughly.

Step Five: Check Your Roof Cavity If It Is Safe to Do So
If your home has accessible roof cavity access through a manhole or inspection point, and it is safe to look — meaning no structural sounds, no sagging, and conditions outside are not dangerous — take a torch and have a look inside.
You are not going in there to repair anything. You are going to gather information that will help the roofer who arrives understand the situation much faster than any ground-level inspection can.
Look for dark staining on the timber framing. Look for wet or waterlogged insulation batts. Try to identify the general area from which the water appears to be entering. Take photos of everything you find.

Here is something critical to understand about roof leaks that most homeowners discover only after a professional explains it. Water travels. The point where you see water dripping inside your ceiling is rarely the actual entry point on the roof surface. Water can enter the roof five, eight, even ten metres away from where it appears inside, running along a rafter or ridge beam until it finds a low point or gap to drip through. The roof cavity check often identifies the true source area much more quickly than looking at where the drip appears on the ceiling.
Do not enter the roof cavity if you hear any cracking sounds, see sagging structural members, or notice the space smells strongly of mould. Waterlogged insulation batts are extremely heavy and can cause ceiling joists and rafters to fail without warning.
Step Six: Call a Licensed Roofer — Right Now, Not After the Rain Stops
This is the step that too many homeowners delay. They tell themselves they will wait until the storm passes, or until morning, or until conditions improve. That decision costs money with every minute it continues.
A reputable roofing company with genuine emergency capability can deploy a crew to apply temporary tarping while it is still raining. That temporary protection stops water entry and buys time for a full diagnosis and permanent repair once the weather clears. If the company you call says they cannot come during active rain and asks you to schedule something later, call the next one on your list.

When you call, give them three pieces of information immediately. Where the leak appears to be located on the roof and roughly how large the affected area seems. Whether water is near or touching any electrical fittings inside the home. And what the current weather conditions are. This helps the crew bring the right materials and carry out their own safety assessment before they arrive.
The Electrical Danger That Most Homeowners Miss
This subject deserves more than a single step because it is the one that poses the most serious risk and the one that is most consistently ignored during the chaos of an active leak.
When a roof leaks during a Queensland storm, the instinct is to focus entirely on the visible water. The drip coming through the ceiling. The spreading stain. The bucket that is filling up. What people do not think about in that moment is what the water has passed through on its way down.
Ceiling cavities in homes across Toowoomba contain wiring runs, junction boxes, ceiling fan motors, and downlight transformers. When water saturates the insulation around these components it does not always cause an immediate visible problem. What it can cause is a slow and hidden deterioration of insulation around wire connections, or a sudden short circuit when the saturated material makes contact with a live component. Electrical fires that start inside walls and ceiling cavities are among the most dangerous because they are invisible and can burn for some time before anyone smells smoke.
If there is any moisture near an electrical component in the affected area, the circuit breaker is your safest tool. Turn it off. Call a licensed electrician to inspect the affected wiring before power is restored to that area. This is not overcautious. It is the correct response.
Should You Poke a Hole in a Bulging Ceiling?
Yes. In almost every situation, carefully releasing a ceiling bulge yourself is the right thing to do — and it is something many homeowners understandably hesitate over because it feels counterintuitive to deliberately make a hole in their own ceiling.
Here is what is actually happening when you see a bubble or blister forming in ceiling plasterboard or gyprock. Water has collected in a pocket behind the board and is sitting there under its own increasing weight. That bubble may contain far more water than it appears to from the outside. If you leave it, one of two outcomes becomes inevitable. Either the bubble grows until the board gives way entirely, dumping a sudden large volume of water onto your floor, furniture, and belongings below in an uncontrolled collapse. Or the water finds another path and spreads further through adjacent ceiling board, saturating more area and potentially reaching structural timber or electrical components you cannot see.
The controlled puncture is the better outcome in almost every case. Use a nail, a screwdriver, or a small utility knife. Find the lowest point of the bulge, which is where the water is deepest and the pressure is greatest. Puncture it carefully and hold a bucket directly underneath. The water will drain in a controlled stream rather than a sudden collapse, and you preserve the surrounding ceiling board from further saturation damage.
One important check before you do this. Confirm that you have already turned off power to any electrical fittings in that part of the ceiling. Water conducting through a ceiling light or fan fitting during this process is a serious risk. Power off first. Then drain the bulge.
How Fast a Roof Leak Damages Your Toowoomba Home
One of the reasons that immediate action matters so much is that water damage escalates quickly and does so in a non-linear way. The difference between a manageable roof leak repair and a large-scale renovation is measured in hours during the early stages of a leak. Here is an honest look at the timeline.
Within the first few minutes of a roof leak, water enters the roof cavity. Insulation batts begin absorbing moisture immediately and start losing their thermal performance. Any electrical components in the cavity are at risk.
Within the first hour, ceiling board and wall materials begin to saturate. Water stains appear. The weight of absorbed water starts placing stress on the fixings holding ceiling board to the joists above.
Between one and six hours, flooring, furniture, and personal belongings face serious risk. Timber flooring begins swelling and warping. Carpet holds moisture deep in its backing layer. Electronics that have been reached by water are in most cases beyond economical repair.
Between six and twenty-four hours, structural timber begins to soften. Roof decking, fascia boards, rafters, and ceiling joists that remain wet start to deteriorate. This is the window where a repair transitions into a renovation.
Between twenty-four and forty-eight hours in Queensland’s climate, mould begins to form. The combination of warmth and humidity means mould spores can colonise wet building materials faster here than in cooler parts of the country. Once mould is established, remediation becomes a separate, substantial, and often disruptive process on top of the original repair work.
Beyond forty-eight hours the damage compounds in every direction. Rot, ongoing mould growth, structural weakening, and cascading damage to adjacent materials all accelerate. What began as a leak repair now involves ceilings, walls, floors, and potentially framing and roof decking replacement.
A $500 leak caught in the first thirty minutes and properly contained is a very different situation to the same leak left for two days.
Safe Temporary Measures While You Wait for Professional Help
Everything that follows applies only to interior measures and ground-level actions. None of it involves going onto the roof, and none of it should be attempted during rain, wind, or any adverse weather.
Inside the home, keep managing the active drips with your containers and use the string trick to prevent splash spread. Run a fan or a dehumidifier in the affected area to begin moving moisture out of the space. This slows the onset of mould and helps lightly saturated ceiling board begin drying. Close interior doors to rooms adjacent to the leak to prevent moist air from spreading through the house. If water has reached carpet, carefully lift the edge of the carpet away from the skirting board and direct a fan underneath the backing. Wet carpet backing left in contact with the subfloor will begin developing mould within a day in Queensland conditions.
Outside, and only once it is fully safe to do so with no rain, no wind, and stable conditions, a heavy-duty waterproof tarpaulin placed over the affected section of the roof is the single most effective temporary measure available to a homeowner. The tarp needs to extend at least one metre beyond the suspected leak area on every side because water travels and a tarp that only covers the obvious spot will fail to stop entry from adjacent areas. Secure the tarp by sandwiching its edges beneath lengths of timber or batten. Do not nail the tarp directly to the roof surface. Nails create new penetration points for water entry.
If you cannot safely access the roof yourself, leave the tarp placement entirely to the professional roofing crew. No temporary fix is worth a fall from roof height.
What Not to Do When Your Roof Starts Leaking
Just as important as the correct actions are the mistakes that make the situation significantly worse. These are the most common ones.
Do not wait for the rain to stop before acting. Every minute without containment is a minute of spreading damage. Begin protecting the interior immediately and call a roofer straight away.
Do not go onto the roof in unsafe conditions. Wet roofing surfaces are among the most treacherous walking surfaces imaginable. Falls from roof height are a leading cause of serious and fatal injury in residential settings.

Do not apply sealant or tape over the visible drip point inside the home. This is one of the most consistently damaging mistakes homeowners make. Blocking the visible drip does not fix the entry point on the roof. It redirects water to a new path, often deeper into wall cavities or roof framing where it causes hidden, expensive damage that is far harder to remediate than the original drip.
Do not clean up before photographing the damage. Insurance adjusters need to see the damage as it was when you discovered it. Cleaning up first can complicate or invalidate your claim.
Do not assume a small visible drip means a small problem. The drip you can see inside is a symptom. The actual cause on the roof surface may be affecting a much larger area. Small visible leaks are almost always evidence of larger invisible ones.
Do not hire a contractor who cannot confirm they hold a current Queensland Building and Construction Commission licence. After storms in the Toowoomba region, unlicensed traders sometimes approach homeowners directly with cheap emergency repair offers. Always verify their QBCC licence before work begins.
What Happens After the Emergency Is Handled
Once the immediate leak is contained and a roofer has either performed or is on the way to perform a temporary repair, the next phase begins. This is where many homeowners make a costly second mistake. They assume the temporary fix resolves the issue and delay getting a full professional inspection.
The temporary repair stops the water entry. The inspection is what finds out why it was leaking, where the true entry point is, and whether there is additional damage that was not visible during the emergency response. Common findings include insulation batts that appear dry from below but are fully saturated within the cavity, timber decking that has begun softening in areas adjacent to the visible repair, and secondary entry points that the original active leak was masking.
Contact your home insurer as soon as the immediate emergency is handled. Be specific about the timeline when you call. Explain when you first noticed the leak, what weather conditions existed at that time, and what steps you took to contain the damage. Provide your photos and video documentation. Ask whether an adjuster needs to attend the property before permanent repairs begin, because most Queensland insurers require this for claims of any significant size.
Once conditions are safe and a temporary repair is in place, book a comprehensive roof inspection. Not a ground-level assessment. A proper on-roof inspection that covers the full extent of the roofing system. This is particularly important after storm events in the Toowoomba region and across the Darling Downs, where hail and high westerly winds can cause widespread tile damage that only manifests as an active leak during the next significant rainfall.
A thorough inspection will tell you clearly whether you need a targeted repair, a partial section restoration, or whether your roof as a whole is approaching the end of its serviceable life and would benefit from a full restoration. Those are different conversations with very different cost implications, and you deserve a straight, honest answer to each of them.